After spending hours scrolling through Pinterest and Instagram and looking at all those insanely creative nail designs, you might feel like there’s no way to recreate all these innovative looks without an array of tools and several years of beauty school experience under your belt.
And yet, not every head-turning piece of nail art requires expertise and fancy salons. On the contrary, it’s entirely possible to achieve gorgeous and creative mani designs in the comfort of your own home. All you need are basic tools, a steady hand and a couple of tricks up your sleeve.
Hot Pink and Silver Glitz

Do you like the look of vibrant pink nails, but want to add a dose of glam to your mani?
It’s super easy! Just infuse it with some glitter and – bam – your nails will instantly look dolled up and more elegant.
To begin this look, you first need to find your perfect shade of pink.
When choosing nail polishes, let your complexion be the guide. Here are a couple of pointers:
- Pale skin tone with cool undertones will look best in pearly and dusty pinks
- Medium and olive complexions are complimented with peachy and coral-hued pinks
- Deeper skin tones will look great in pigment-rich hot pinks and magentas
Once you’ve found your ideal match, clean up your nails and file them into a flattering shape.
Add a layer of base coat to create a uniformed surface. Coat 3-4 nails on each hand in pink lacquer.
There are a couple of ways you can add glitter to the remaining nails.
One is with glitter nail polish, which you can add in layers using the brush, or by applying it on a sponge first, then dabbing it onto the nails.
Alternatively, you can apply loose glitter while you base coat is still tacky to achieve a more textured look.
When you’re happy with the way your mani looks, clean up the edges and seal your hard work with a layer of top coat.
Glam Greyscale
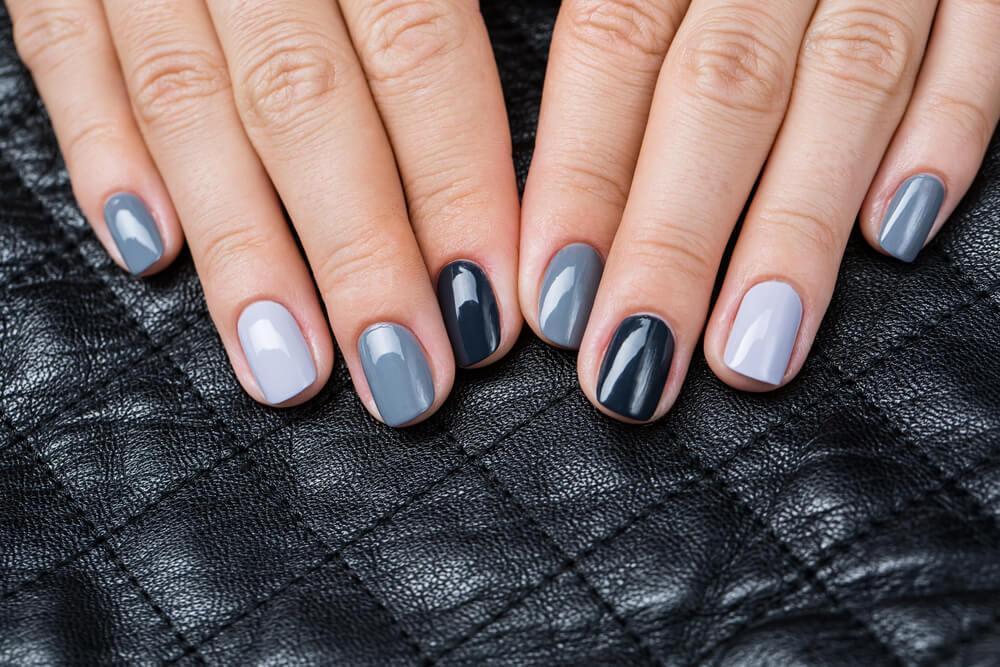
Perhaps bright, vibrant colors aren’t your thing.
On the other hand, you might feel like sporting that same muted lacquer is getting a bit monotone.
Well, we have some good news for you – this innovative look combines the polished effect of muted hues with the creativity of gradient manis.
All you need is 3-4 polishes of ranging hues to create the more dynamic effect.
Since this look is all about the harmony of several shades from the same family, make sure your nails are prepped and filed to look neat and uniform.
Then, add a layer of base coat to secure the longevity of your mani.
Once it dries, proceed to coat different nails with different lacquers, gradually adding layers to create full opacity.
Three-Tone Green
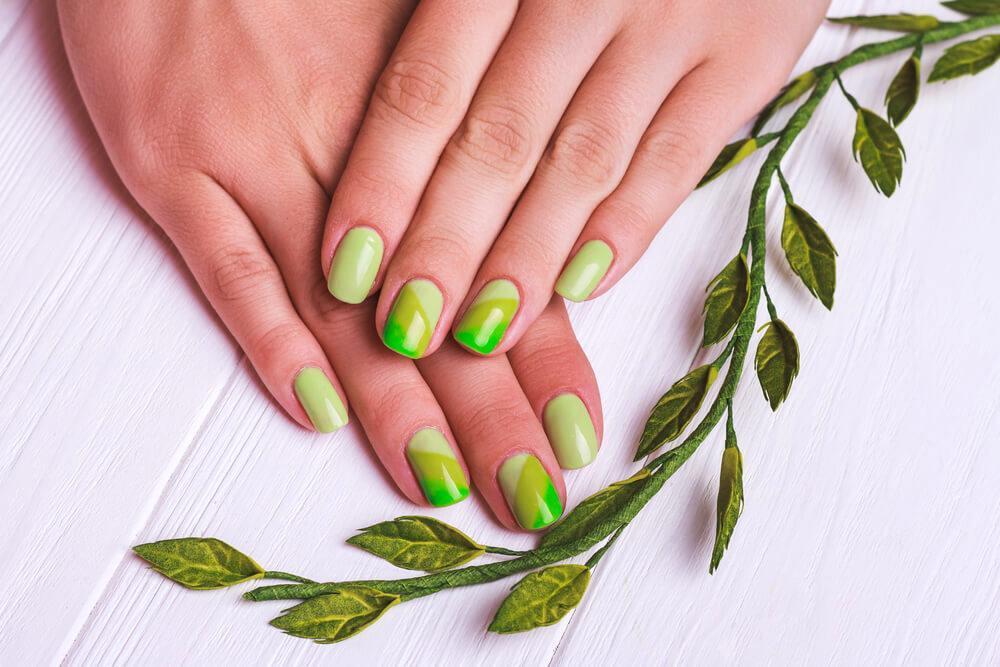
We all love to rock bright colors in the summer, but even they run the risk of looking to samey.
Instead of sticking with the same old monochromatic theme, you can perk up your mani by adding two or three different shades of green.
They will look even more interesting if you place them next to each other in a diagonal alignment.
It might look tricky to achieve, but it’s actually fairly easy to pull off.
First, get your nails in order by cleaning them up and filing them into desired shape.
Next, paint each nail in the palest shade of green (lime and seafoam green are all good choices for base color), then wait until completely dry.
Then, apply nail tape across two nail diagonally, so the bottom third of the nail is covered. Add a layer of darker green polish across the uncovered part of the nail.
Once that is dry, remove the tape and add a new one, this time only leaving the top part uncovered.
Paint the tips in the darkest shade of green and leave your nails until they’re fully dry.
Remove the tape and set your art with a layer of top coat.
Gradient Effect
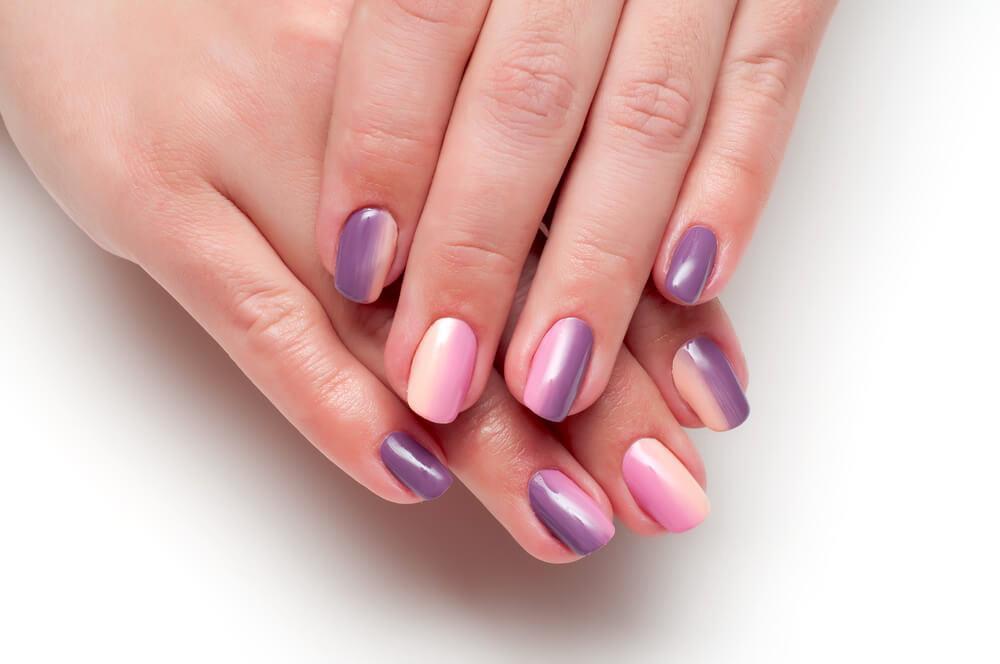
If you’re looking to mix up two or three colors on your nails in a way that’s creative and clean-looking, you might want to go for this sensual gradient design that will look flattering on any length and shape.
If you want achieve high contrast, combine two bold, bright colors. For something more understated, make the transition go from pigmented to nude.
And even though this look might make you think requires advances techniques, it’s actually quite easy to achieve!
All you’ll need is a piece of sponge and a couple of lacquers of your choice. The look pictured above incorporated nude, pink and mauve shades.
Take your polishes and apply them horizontally on the sponge, making sure its well drenched with the lacquer. Start dabbing it on one nail until you achieve seamless transition. Repeat the same process on each nail until you’re happy with the way the gradient turned out.
Pro tip: if you want to avoid messing up the area around your nails while you’re dabbing the polish, apply a bit of liquid latex around the edges to secure clean skin.
Finish off your mani with a layer of glossy top coat and you’re all done!
Sprinkle on Top
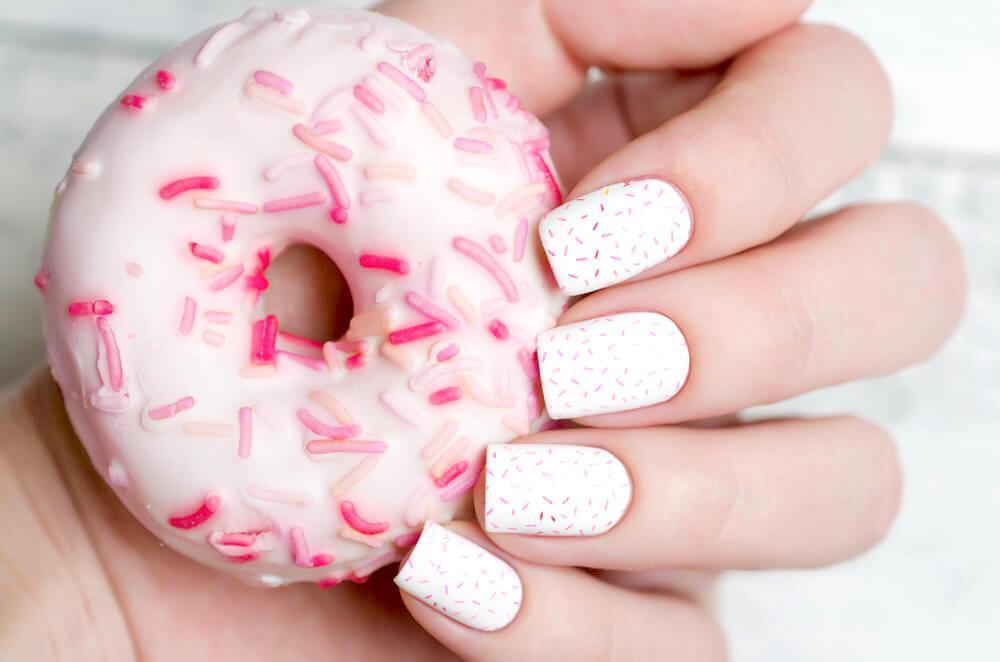
This mani will be a bona fide treat for all nail art enthusiast who’d like to experiment with unusual designs.
If features a pale matte base and delicate design on top that gives the illusion of multi-colored sprinkles.
What’s more, this cute confectionary look is super easy to achieve.
First off, you’ll need to trim your nails and file them into whichever shape suits you the best.
Then, apply a thin layer of base coat to even out the texture and ensure clean canvas.
Next, apply your base color: this can either be stark white, or something ever-so-pigmented, like pale pink or lavender. Still, make sure the color is light enough, so that the “sprinkles” could pop.
Once the base is dry, create your topping by taking an ultra fine brush and drawing mini-lines on your nails. You can combine two to three different polishes to create a more dynamic effect; for example, a bright pink, peach and nude colors should do the trick.
When you’re happy with the way your candy nails look, give them one last layer of top coat and you’re good to go!
Gradual Glitter
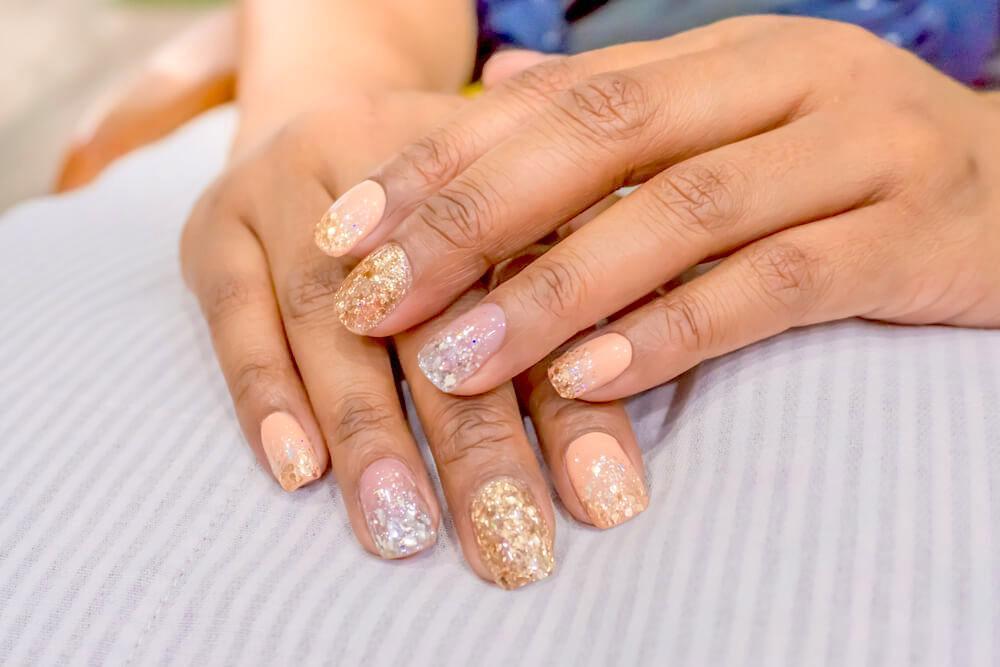
If you feel like a bit of razzle and dazzle on your nails is always welcome, then you will definitely enjoy this glitter-packed mani.
It features both silver and golden hues, and can be perfect to amp up any evening or festive look.
Begin creating this look by cleaning up your nails, pushing down the cuticles and filing them, so you have plenty of space to work with.
Next, apply a layer of base coat. On the nails where you’re planning to apply silver gradient, get going while the base polish is still tacky.
Apply the glittery silver polish in layer, starting about two thirds down your nail, then shortening every next layer by a couple of millimeters.
For the final coat of glitter, focus only on the tips.
Apply a nude or peachy base on the nails which are going to be covered in gold glitter.
Once they’re dry, apply the gold polish in the same way you did with the silver one – in gradual strokes until achieving a luminous gradient.
And if you really want to make your mani stands out, set aside one nail on each hand to be drenched in glitter. You can do this by applying the glitter nail polish using the sponge technique, or simply by applying the base coat, then dabbing your nail in loose glitter while the polish is still tacky.
Once you’re happy with the amount of bling, clean up the edges and seal your hard work with a clear top coat.
Retro Polka Dots
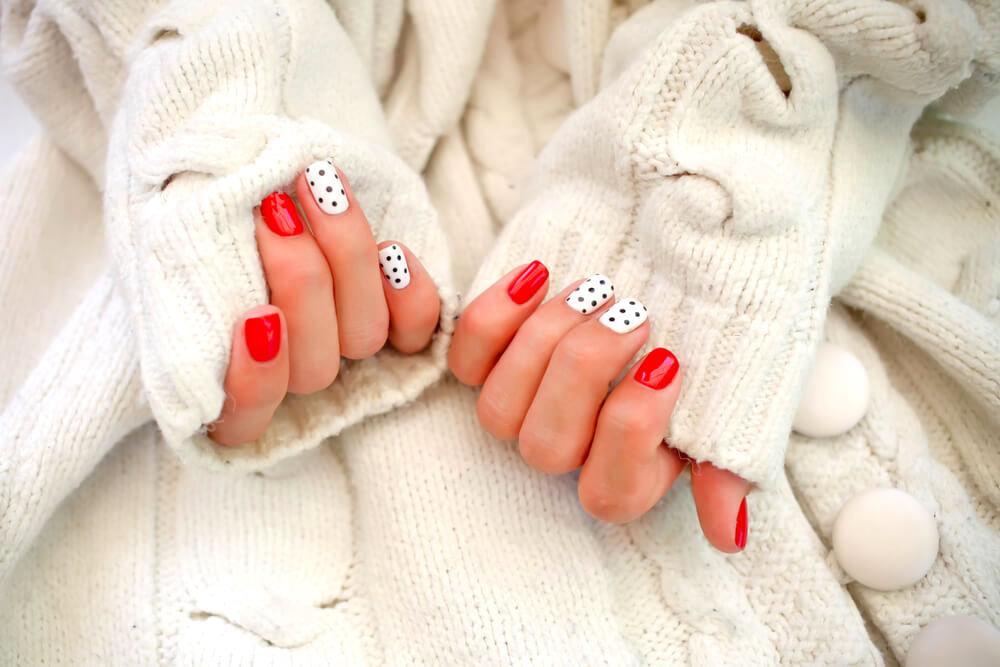
Some nail designs and patterns are simply timeless – and polka dots is definitely one of them.
So, if you want your nails to channel these funky, vintage feels, why not dress them up in this playful design?
You’ll make your B&W mani stand out even more if you pair it up with bright ruby nails.
To create a perfect retro style, start by applying a base coast, then adding two or three layers of red lacquer on the nails you plan on keeping monochrome.
For the polka dot-adorned ones, use an opaque, matte white as your base.
Take a rich black lacquer and apply the dots using a super-fine brush, by gently tapping over the white.
When you’re happy with the way your 1950s nails look, give them one final swipe of clear nail polish and your look is complete.
Mint and Lavender
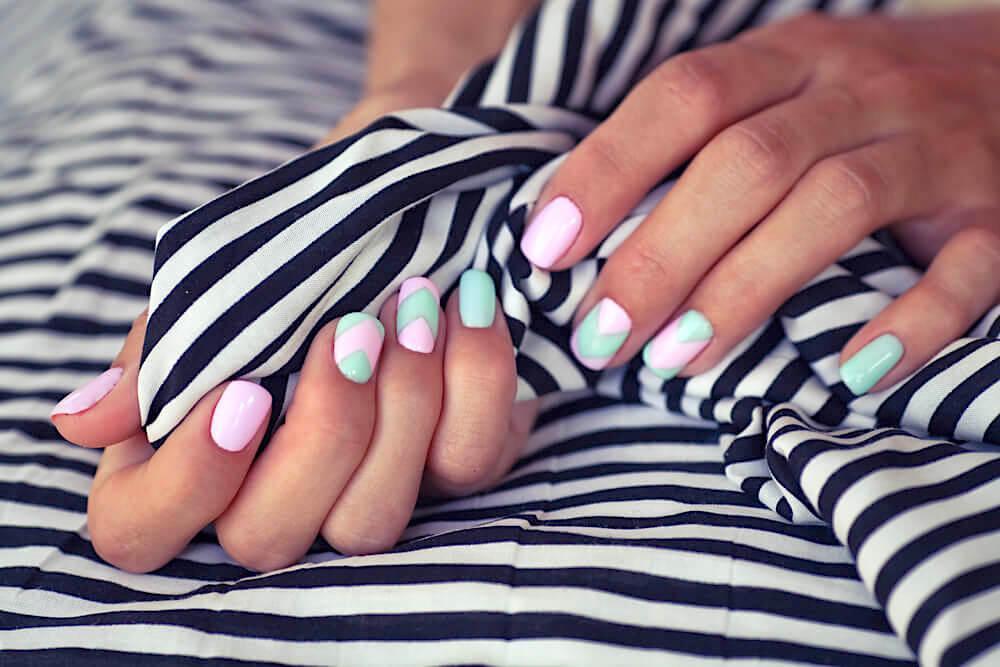
When picking colors to adorn our nails with, many people think the choice has to be made between understated nudes and loud, vibrant pigments.
Sometimes, however, the perfect color combo lies somewhere in between – as evidenced by this gorgeous, yet unassuming mani in delicate minty pink and pale lavender.
Combining the two colors by painting your nails in alternate order is one option; however, the contrast between the two hues might be even more flattering if you add a geometric pattern on a nail or two.
You can do this by coating the entire nail in the color that will serve as your base (you can choose either mint or lavender, or alternate between each nail).
Then, once your base is dry, apply a thick, angled nail tape across the middle. Coat the uncovered part of the nail in the contrasting color and leave to dry before you take the tape off.
Finish off the look with an extra layer of top coat to protect your design.
Icy Blue
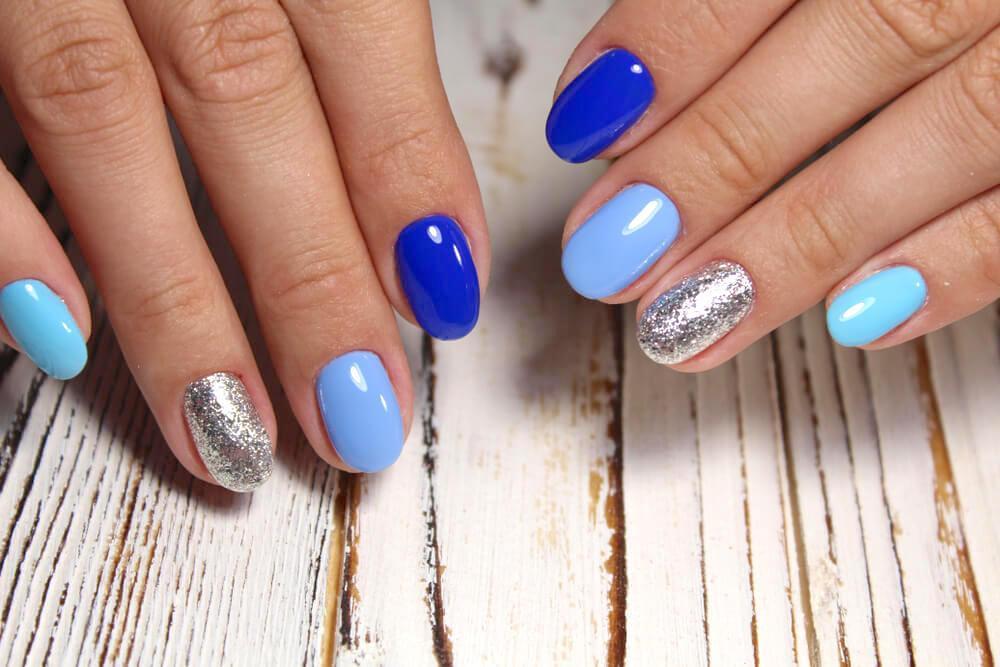
Turquoise, navy and cobalt hues can be incredibly flattering on the nails, especially when combined.
And if you want to take your true blue mani up a notch, contrast it against textured, silver glitter, and it will instantaneously pop.
To achieve this striking style, grab a hold of couple of shades of blue: one can be deeper, navy tone; powder blue works well as medium shade, while turquoise can be your lightest hue.
Clean up your nails and use a file to shape them, then apply a base coat to make your mani long-lasting.
Figure out which nail you want to cover in which lacquer. Start swiping the layers of blue across your nails, leaving one to be covered with glitter.
Apply a touch of liquid latex around the edges of the nails you’ve designated as the glittery ones.
Take your glittery polish and load it generously onto a piece of sponge. Start dabbing the sponge onto the nail, and keep going until you’re satisfied with the way it looks.
Clean up the latex you had applied beforehand, then set your mani with a layer of top coat.
Lilac French
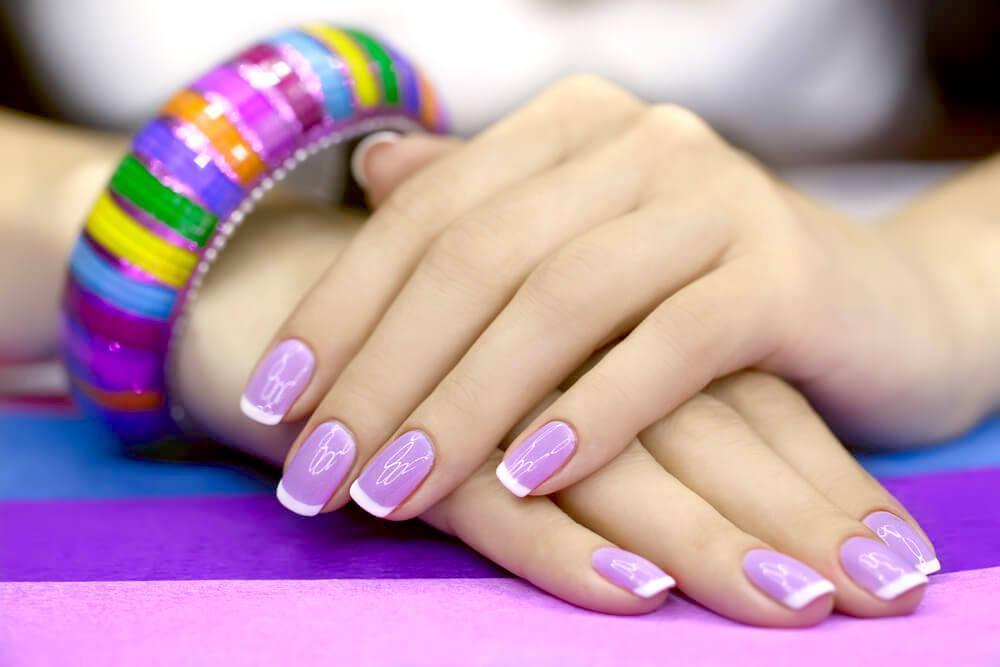
There’s nothing more flattering on the nails than the classic French manicure.
However, even this beloved style can get tired after a while.
Fortunately, there are ways to jazz up your French mani while still keeping it perfectly neat and polished.
The revamp of the traditional manicure includes switching the clear or nude polish with something a little more eye-catching.
For example, lilac is the perfect shade if you want to add a pop of color to your mani while keeping it subtle and stylish.
Start off by filing and buffing your nails until you have a perfect canvas. Then, apply a base coat to make sure the surface is clean and even.
Next, apply the lilac, making sure the strokes are even and seamless.
Once the base color is opaque and dry, place tape on your nails, so only your tips are left uncovered.
Grab a milky white lacquer and carefully paint the tips of your nails. Use a finer brush for better precision.
Once the white polish is dry, remove the tape and add a final layer of top coat.
By now, you should be convinced that it doesn’t take much to be a master at creating stunning manicures. With a little bit of practice and these useful tips, we’re sure your fingers will be sporting a true DIY work of art in no time.


Leave A Comment