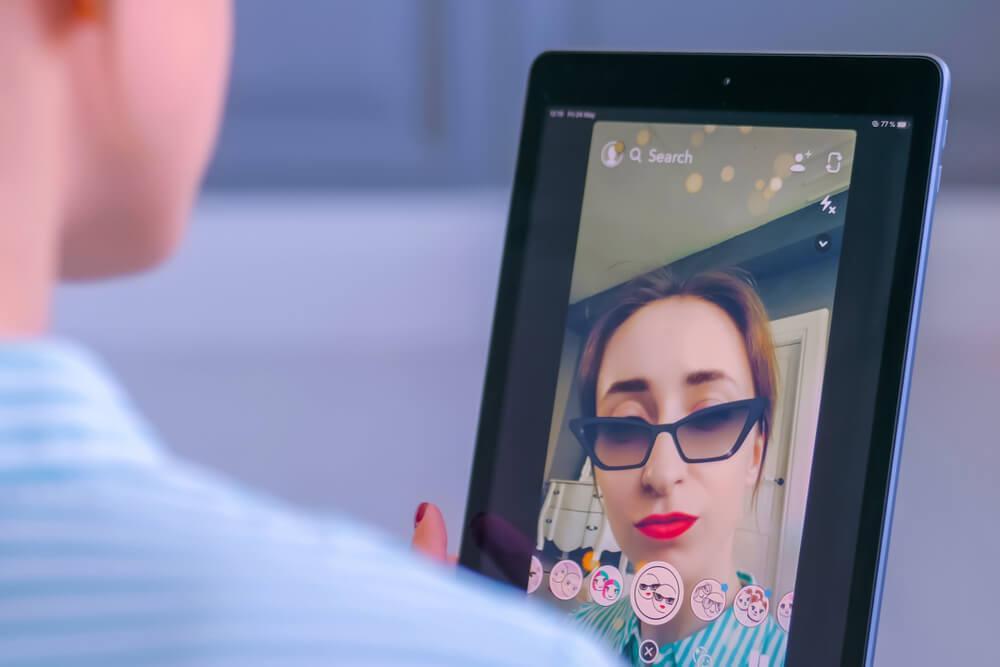
There is no denying that Snapchat filters have elevated the selfie game. This is precisely why Snapchat filters provide excellent inspiration when it comes to makeup.
If you’re looking to step-up your makeup game, we’ve compiled four Snapchat-inspired makeup looks for you to try out.
The Hawaiian Flower Filter
https://www.instagram.com/p/Bjjl7ptFi8b/?hl=en
This dreamy tropical Hawaiian filter has easily become a crowd-favorite. It’s got everything you need for that cute, casual look:
- that sun-kissed summer glow
- a faux tan
- cute faux freckles
- a pretty lil’ flower to brighten up your face
To get this look, follow these simple steps.
Step 1: Prime your face
This Hawaiian flower filter makes anyone appear to have flawless skin. Because of this, you want to make sure you use a makeup primer of your choice. Doing so will provide you with the most effortless smoothing effect. This will also give you an overall radiant look that will resemble the glow this filter gives off.
Step 2: Apply your foundation
Once the skin is primed, you want to continue giving yourself the unblemished complexion illusion. Make sure that your skin still looks natural and not too cakey when you choose a foundation. Blend the foundation well, aiming for a seamless finish. You’re a step closer to becoming a real-life Snapchat filter!
Step 3: Add bronzer
This Hawaiian flower filter is best-known for its sun-kissed look. To achieve this, use a bronzer with a hint of shimmer in it. Apply the bronzer to the hollows of your cheeks and temples. Do not forget the sides of your nose too! Depending on your preference, you can apply this as heavily as you want, especially if you are going to use this for a costume party. However, if you’re just going to go for a casual day out, make sure you apply just the right amount.
Step 4: Faux freckles
This Snapchat filter is not complete without the addition of faux freckles. Use an eyeliner (preferably a pencil one), and lightly draw small dots along your cheeks and nose to create the illusion of freckles. Be careful not to press the eyeliner too hard since this might make it look too fake on your skin.
Step 5: Soften the faux freckles
Make your faux freckles look more natural by gently patting them with your fingers or blending them with a sponge afterward. You can also achieve an airbrushed look by finishing off with a face powder. Take any powder of your choice and lightly dust it over your face. Look out if the powder is covering up your freckles too much. Applying powder will also help you set your makeup so that it lasts longer.
Step 6: Don’t forget the lashes
Snapchat filters are known for giving you unnatural or exaggerated features. To complete this look, you would need to make your lashes extremely full. Pick your favorite and most dramatic fake eyelashes, put them on, and add a few coats of volumizing mascara to seal the deal.
Step 7: Accessorize your look
Of course, while this isn’t technically a makeup step, it is necessary to top off this look! Simply get any Hawaiian flower clip and place it on your hair just above the left ear.
Floating Hearts Filter
https://www.instagram.com/p/Bg8PvpaFa9l/
This one is probably the most popular filter as it is seen on a lot of Instagram posts. With its airbrushed effect and flawless selfie look, no wonder it has made it to the top of the charts. Here’s how you can recreate the look in real life:
Step 1: Use a primer
Just as you did with the Hawaiian filter, you want to create the most flawless base for your foundation. It is just what you need for that picture-perfect finish. Apply this on the areas where you usually get oily. Often, that’s right along your T-zone area. Then, move right along!
Step 2: Apply foundation
This filter will require you to have a full coverage look while still giving off a natural finish. Choose a foundation which promises a total cover effect. You can opt for a super matte or a slightly dewy finish, depending on your preference.
Step 3: Conceal
For this, you would want to create the appearance of youthful and well-rested skin. Sometimes, foundation won’t be enough to give you the flawless base you’re aiming for. Amp up the coverage of your foundation by looking for a medium to full coverage concealer. Draw an upside-down triangle shape under your eyes, blend well, and instantly look more awake and energized.
Step 4: Grab your blush
This filter does not necessarily give you the most chiseled look, but it does give you a pink flush to go with the pretty pink hearts. Choose any trusty blush that you want. You can use a powder blush, a cream blush, or even a cheek tint. It is best if you stick with pinkish tones or those that resemble the natural color of your blush. Apply it right on your cheekbones and go slightly into the hollows of your cheeks. This technique, called “draping,” can create a blush contour effect.
Step 5: Lashes again
This filter also gives anyone the illusion of long and luscious lashes. To get this look, you can either grab falsies or double the coating of your favorite mascara. Choose a mascara that is both lengthening and volumizing to get the best results.
Step 6: Draw your hearts
Really dive into this look by adding the famous hearts. These can be recreated by using eyeliner in a pink/rose color. Draw hearts on your forehead, with varying sizes and placements. Get creative and go all out! Just make sure you choose an eyeliner that is both smudge-proof and waterproof.
Step 7: Finish with a setting spray
The trick to achieving this flawless look is to make it seem like you always “just applied” your makeup. Achieving this comes easily by spritzing your face with makeup spray. You want your makeup spray to be long-wearing so that your makeup lasts the whole day. There are several options of makeup spray, depending on your skin type and the type of finish you want.
The Famous Dog Filter
https://www.instagram.com/p/B24LK03oZUK/
The Snapchat dog filter was one of the first filters to be created. Deservingly, it is still one of the most popular filters to be used to date. To create this classic filter makeup look, check these steps out:
Step 1: Apply a primer
Again, start with a primer to give off the best base for the rest of your makeup. You will thrive with a flawless base for all of these looks. No Snapchat filters look cakey!
Step 2: Grab your foundation
Apply any foundation you trust. Try going for a demi-matte finish for this look just for a change. Again, make sure you blend your foundation seamlessly. Extra tip: Put some foundation all the way down to your neck and even on your ears. This is so you don’t look like a floating head!
Step 3: Use concealer
Easily resemble the Snapchat filter by applying concealer under your eyes to brighten up your appearance. You can also grab a lighter concealer to emphasize areas you want to highlight, such as the area between your brows and below your mouth.
Step 4: Apply blush
The dog filter gives off a blushing cheek effect which is fortunately easy to replicate in real life. Apply any blush of your choice to the hollows of your cheeks and cheekbones. Try not to go too heavy with the blush on this one. Don’t worry; you’ll have the chance for that later.
Step 5: Don’t forget the mouth and nose
This dog filter wouldn’t be famous if it weren’t for these features. To make your dog mouth, grab a light brown face paint (make sure this is safe and hypoallergenic for your skin). Once the base of the mouth is applied, take a brown liquid eyeliner and draw on your dog nose. To complete the “dog look,” add faux freckles to the side of the mouth you just made.
Step 6: Mascara… again!
As you may have noticed, long and voluminous lashes are a staple for any Snapchat filter. This look will also require you to add a very intense volume and length to your lashes. Again, grab falsies or a heavy-duty mascara to do the job.
Step 7: Accessorize
All you need to do is add a pair of dog ears, and then you’re set.
The Drag Queen filter
Last but definitely not the least on this list! This look follows almost the same steps to a real drag queen makeup look, except it’s a lot simpler! This look totally gets all the F’s you want!
- Fun
- Fierce
- Fabulous
- Fearless
You can follow the actual tutorial for this, but these steps pretty much sum everything up:
Step 1: Grab a glue
Yup, that’s right. You would need actual glue for this one. If you’re familiar with drag makeup, you would know that it involves re-shaping the brows. Hence, your natural brows must first be covered to allow for a blank canvas. Simply grab a glue stick (preferably in a purple color as this is easier to conceal) and brush it back and forth your eyebrows to flatten and keep them in place. Set with a heavy-duty powder afterward.
Step 2: Create your base
Now, you can start building a base with your foundation and concealer. Give extra attention to the brows you just covered with glue. You may want to opt for full coverage products to ensure you can cover your eyebrows easily. Bake with powder for a more seamless finish.
Step 3: Outline your new brows
After creating a blank canvas for you to work on, grab an eyeliner to draw the eyebrows as seen in the Snapchat filter. It might take a while to perfect the shape, so you may want to practice on your hand or somewhere else beforehand.
Step 4: Eyeshadow
Using the Snapchat filter as a guide, grab a red eyeshadow and apply it on your upper crease, following the shape of your new brow. In this case, your upper crease would actually include your natural brows. After, smoke out the eyes by reaching for a black eyeshadow. Put this on the outer corner of your eyes as you blend it inwards. Also apply a small amount on your inner corners and the upper part of the side of your nose. To end, use a slightly shimmery champagne-colored eyeshadow at the middle of your eyelid and blend everything again.
Step 5: Eyeliner
Define your eyes and make it look more dramatic by lining your eyes and your waterline. This will surely make your eyes pop!
Step 6: Mind your lashes
Mascaras won’t cut it for this look, so go ahead and look for a very dramatic set of falsies. Also, don’t forget to buy an extra pair for your lower lashes. Yup, this look is extra like that.
Step 7: Contour… a lot
This is a defining feature of the classic drag queen filter. This is your time to get the most sculpted face by grabbing the perfect contouring shade. Apply this to the usual areas—jaws, cheekbones, sides of the nose, and along your forehead. Don’t be afraid to get a little heavy-handed; just make sure that everything is still blended nicely and smoothly. We’re not really aiming for a natural look.
Step 8: Apply blush
Everything about drag is as extra as you can imagine. Just as how you contoured, this is the time to get as intense with the blush. You can use whatever color you feel for this. Apply it right above your cheekbone contour until it looks exaggerated and unnatural. When it does, then you are doing it right!
Step 9: Lipstick
The trick is to apply a deep red lipstick to achieve the overly glam look. Do yourself a favor and overline your lips, too. Make sure to define the shape of your lips really well, just like the Snapchat filter.
Step 10: Outline
The final touch would be grabbing the blackest eyeliner you can find and outlining your lips with it. Don’t forget to draw the mole right above the left corner of your lips.
And there you have it. Four simple Snapchat-inspired makeup looks to try for your next big event, or just a casual day out. Remember the following basics of recreating these looks:
- flawless base
- trusty foundation, don’t make it cakey
- lashes—long and voluminous lashes!
- sculpt your face with blush and contour
- have fun and accessorize
- most importantly: blend, blend, blend!
With these looks, you are sure to be the center of attention. Good luck and enjoy recreating!


Leave A Comment